CAM Mode Overview
Kiri:Moto's CAM mode is designed for subtractive manufacturing processes, primarily CNC milling. This mode provides a streamlined, browser-based workflow for generating toolpaths from 3D models and exporting G-code for a wide range of machines.
This page provides a high-level overview of the CAM workflow. There are subpages for specific parts of the workflow.
Arrange
Begin by importing your model(s) into the workspace. The Arrange stage allows you to:
- Translate and rotate parts on the base platform
- Align multiple objects relative to each other
- Snap objects flat to the bed
- Apply other transformations like scaling and mirroring
- Set your profile options
- set your machine settings
- set your tool library
- set your CAM operations
You can set profile options, and machine and tool settings in any part of the workflow, but doing so will not automatically update other parts of the workflow. You will need to re-slice after making changes.
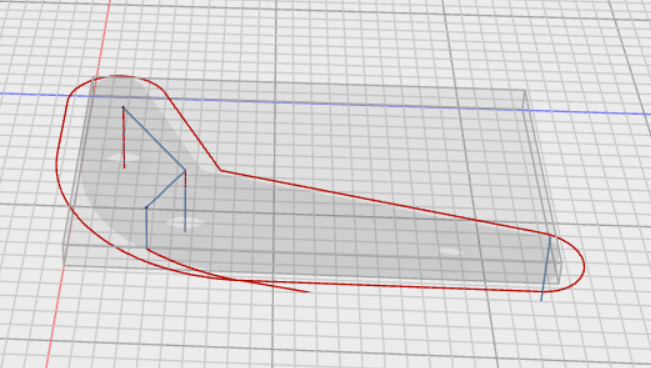
Slice
The Slice stage generates toolpaths based on user-defined CAM operations. The software makes use of worker threads to slice the model without blocking the UI.
When working with complex models, you can toggle specific layers of the slice by toggling them at the botom of the page
![]()
The bottom of the page also has a progress bar that is draggable and shows the order of operations.
Preview
The Preview tab is quite similar to the Slice tab, but has a few key differences:
- Shows tool speeds
- Shows tool movement types (rapid move/ milling move)
- Visually shows tool offsets and tool changes
- Allows inspection of toolpath order and direction
- Helps detect gouges, collisions, or inefficient moves
Overall, the Preview tab gives a more in-depth view of the toolpaths that will be generated.
Animate
Animate is a useful tool to get a sense of how the tool will move through the stock without the risk of actually cutting anything. Animate can show if your gode will collide with the stock, cut too deep, or cut in a place you don't expect.
Export
Once you're confident in your setup, use the Export menu to generate machine-ready G-code.
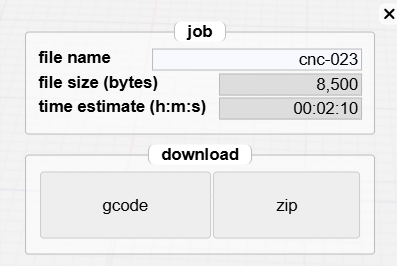
Most of the configuration for this step is done in the Machine settings, so be sure to have that configured before exporting. The tab will give you a time estimate for the job (excluding tool changes), and an option to export G-code to a single file, or as a zipped archive of the sepate operation for each tool.